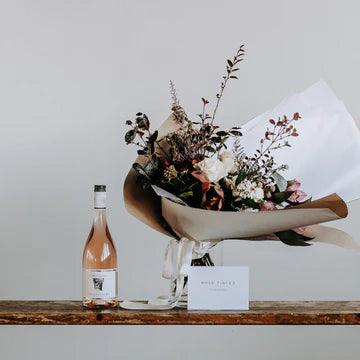
Foraged Arrangement
I love a foraged arrangement. No two are ever the same because you never know what you'll find on your foraging adventure. As I write this, we're still in NZ's level 4 lockdown due to CV-19 so I'm limited with where I can forage but luckily there are plenty of roadside trees, shrubs, flowers, bushes and berries near home for me to choose from.
Now, before we start, there are a few rules about foraging...
- 1) Always use snips. Never break branches off.
- 2) Never take more than you need. Cutting all the flowers from a camelia bush and not leaving any for other people or for the bees is rude and inconsiderate. Poor form. If you need more, go back and trim a little bit more from a different part of the plant.
- 3) Trim from different areas of the plant/bush/shrub. Never take chunks from one side. Trim evenly all over so you don't leave a bald spot.
- 4) If you've spied a rose bush in someones garden, do not take it. Ask nicely, you'll be suprised at how many people say yes. People often love the change to meet those who love flowers as much as them. If they say no, accept it and move on friend.
Remember you don't need just flowers, scout around for autumnal leaves. These will add burgundy and maroon colours. Also keep an eye out for berries or fruit, they make a beautiful addition to floral arrangements too. Side note, make sure you're not adding poisonus berries to your arrangement, especially if you have pets or kidlets at home.


Now you have your florals, it's time to create...
What you’ll need:
Snips
Chicken wire
Your selection of flowers and foliage
step 1: Prep you flowers and foliage
___
Before you create your floral arrangement, you want to process your flowers and foliage, this means trimming your stems. Using your snips, trim excess leaves, thorns or unnecessary greenery from each stem.

step 2: Getting started
___
Place your vase in the centre of a table. Mould your chicken wire into a ball shape with your hands and place it into your vase, filling the space inside. Use some floral tape to hold it in place if you need to.

step 3: Get arranging!
___
Onto the fun part…
Start by 'basing out' your arrangement. This is flower speak for adding your leafy foliage to the vase. Adding these helps establish the shape of your arrangement and cover much of the chicken wire.
As you build onto your base, remember to rotate the vase around so you can see if you have any gaps. Fill any gaps with more luscious flowers and greenery. Play around with the placement and shape until you achieve the look you want. It doesn’t have to be perfectly symmetrical – wild is good!
step 4: Add the flowers
___
Now that you've based out your arrangement, add in the flowers. Start with larger flowers or leading ladies (in my case it's the hydrangeas), keep turning the vase around so you can see where those gaps are and fill them. Then move on to your smaller flowers, the texture and the whimsy. These will be the little summin summin that brings the arrangement to live.
step 5: When is enough, enough?
___
If you're like me, you want to add just a little bit more and a little bit more to your arrangement. If you think you're done, step away from your arrangement for a while, come back to it later and see if it needs anything extra. I find it's always looking at florals with fresh eyes always helps.
Then - Voila! You're done (I think you deserve a wine) x


Leave a comment